Designing a Vibrant Prairie Meadow
- lesannsa

- Jul 7, 2025
- 9 min read
Updated: Mar 18
By Leslie Ann Sadownik, July 6 2025

In Part One of this blog, we explored how a septic system works, the do's and don'ts about planting over a septic field, and the initial steps for creating a prairie meadow.
The steps covered in Part One were:
(1) assessing the site
(2) choosing the right plants
(3) preparing the ground
In this blog, we will cover how to
(4) design your meadow
(5) plant
(6) water and maintain your meadow
Step 4: How to Design a Prairie Meadow

Choose a Design Strategy
There are various approaches to designing a prairie meadow, and experimenting with different methods can be a lot of fun. Regardless of the method, you will start with a palette of plants. We previously discussed some of the characteristics to consider when selecting plants, but before you begin designing, you may also want to consider what "aesthetic" role each plant plays in the landscape.
Plant Roles
Some plants provide strong architectural structure year-round (structural plants), while others, like asters, play starring roles (vignettes) during certain seasons before fading into the background. Finally, there are the workhorses or 'matrix plants'; these usually are grasses or plants that perform well all year long. The matrix plants quietly hold the planting together throughout the year. Your mix of plants in a garden should include all three of these categories of plants. Typically, a perennial meadow will include 5-10% structural plants, 30-50% vignette plants, and 50-75% matrix plants.
Draw a Planting Plan/Design
One design method is to draw out your master plan to scale. Here is an example of a design I developed for my meadow. The background grid is 1 m squares. Remember that ultimately you will have 5-9 plants per square meter. With this method, you can thoughtfully create drifts or blocks of a particular plant grouping to create a stronger visual impact. For further information about this method (as well as the other methods below), refer to Piet Oudolf & Noel Kingsbury's "Planting: a New Perspective". This excellent book contains a plant directory of the majority of plants used by Piet Oudolf. There is a handy table that provides information about the characteristics of plants like their mature size, spreading ability, planting density, and longevity.

Start with a Template
Or you can create a set pattern/grid/module that you will repeat regularly or randomly throughout the meadow. Roy Diblik delves into this method in his "The Know Maintenance Perennial Garden" book. If you understand how individual plants mature, you can group plants together to create a plant community that works functionally and aesthetically. His book includes many examples of designs for a set square area (e.g., 10 x 10 feet). See this great YouTube video on Designing a Mesic Prairie. Here is an example of a modular design I drew up using 8 different species. Each square is 30 cm or approximately 1 foot.

OR Design "On-The-Go"
Or, you can skip drawing a design or template and focus instead on creating a detailed list of plant species, their roles, spacing, the % of planting, etc. With these numbers, you will calculate how many plants of each species you will need. You can determine "what goes where" later in the field.

Once you assemble these plants, you can begin laying them out in the field. I started by first laying out the structural plants, then the vignette plants, and finally distributing the matrix plants evenly throughout the field. There was still plenty of room to add in other complementary plants and annuals.
Alternatively, you can start by laying out your matrix plants first to ensure you have an even distribution throughout the field. There are many great resources that provide more information about this naturalistic meadow planting style (see references).


Step 5: Optimal Planting Techniques
Planting Technique
For young plants in plugs, dig a hole just large enough to accommodate the plug. Submerge the plant in a bucket of water for 1 minute so it is fully saturated. Then plant in the hole and tap down on the soil around the plant. This will eliminate any air pockets and ensure the bottom of the plug has good contact with the soil underneath. For larger plants (e.g., 1 gallon), I like to remove most of the potting medium from the roots of the plant, loosen up and even trim the roots, and then plant the bare roots into the native soil. I believe the plants will adapt sooner and the water will penetrate the root zone better when you remove the potting soil.

Planting the meadow was labor-intensive and took me three weeks to complete. This was truly a labor of love, taking over 100 hours because each hole was painstakingly dug by hand. Of course, if you could prepare your site by tilling and breaking up the soil, it would go a lot quicker!
Mulch, Yes or No?
The benefits of a layer of mulch are weed suppression, moisture retention, and temperature regulation. The disadvantages are that mulch can create an environment that is too moist and lead to crown or root rot of the plant. Also, when bark decomposes, the microorganisms involved in the process utilize nitrogen from the soil to break down the organic matter. This can temporarily reduce the availability of nitrogen for plants. I chose to apply a one-time 2-inch layer of shredded bark mulch primarily to suppress the weed growth. I do not plan on adding any further mulch.


Step 6: Water and Maintenance
Water
The ideal time to plant is in the fall or early spring when natural rainfall will support the plants. Small plants may initially need extra watering. Plants may wilt during a hot day and then recover in the evening. Check your plants in the evening; if they are still wilted, then give the wilted plants a deep watering.

Maintenance
Cut down the meadow once or twice a year. Typically in late fall or early spring, to control taller weeds and promote new growth. Clean-up involves cutting plants back in early spring. Many insects overwinter in plants, so delaying the clean-up of the meadow until spring will provide shelter for insects. If you have self-sowers in the meadow, you may need to monitor how aggressively these plants are spreading. If they are a problem, you may want to deadhead the plants in summer to prevent seed dispersal and weed out any excess plants in spring.
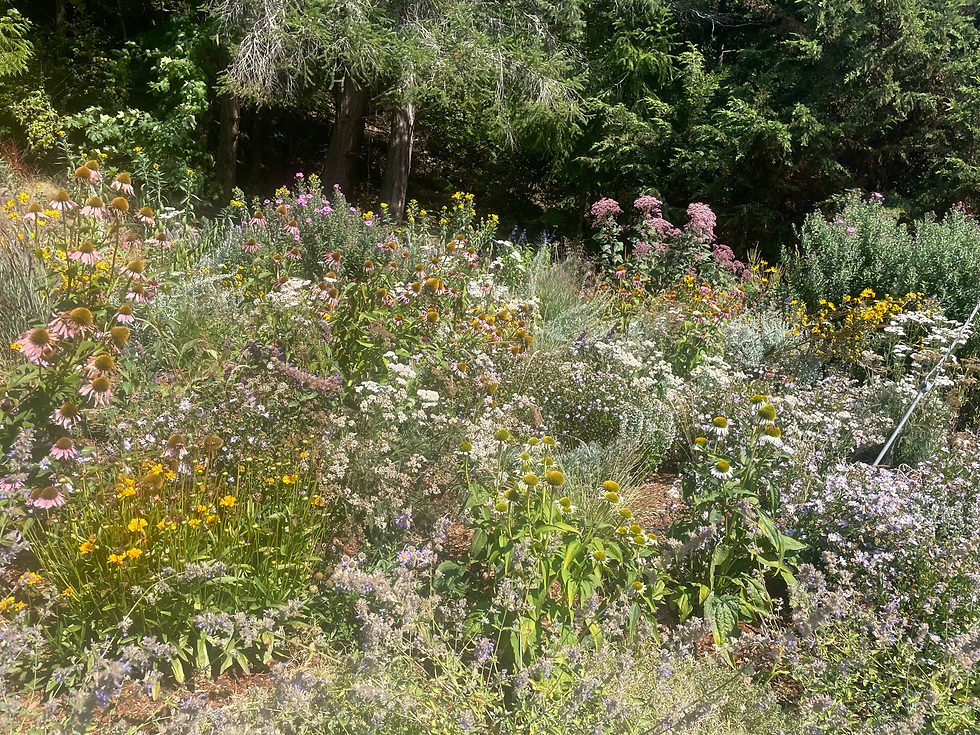
Celebrate the Transformation


Above: the plants in one area of the meadow in April, June, July

A Prairie Update
I am writing this blog in July 2025. It is a little over two months since planting the meadow. We were very fortunate to have a series of rainstorms immediately after planting. The majority of plants are doing well with no additional water. I have needed to water some of the smaller plants after a few scorching days.

The plug plants have grown very quickly (doubling and even tripling in size). The cool-season grasses bloomed shortly after planting, and since blooming then have not put on much growth. I suspect they will bulk up next spring. In some areas, the gaps between plants were greater than 30 cm, and I am glad that we laid down a layer of mulch. The weeding has been minimal, approximately 30 minutes per week.
The meadow has transformed this site, with new blooms appearing every week. I filled in some of the gaps with annuals like Collomia grandiflora and short-lived perennials such as Coreopsis grandiflora "Early Sunrise". These plants have proven to be very floriferous, and I am glad I added them to the planting.

The biggest change is the wildlife. The moment the Field Chickweed started to flower, the pollinators moved in. The meadow is alive with activity! A huge number of pollinators (bees, butterflies, moths, and hummingbirds) visit the meadow daily. I love standing by the meadow and listening to the humming of all the bees. I have also observed dragonflies and snakes in the meadow.


What Did Not Work?
My timing was too late for starting many plants by seed for the meadow. I started seeds in November 2024 and February 2025. I was hoping that the plug plants would be a reasonable size for planting out by late April 2025.
The list of grasses and flowers I started includes
Festuca roemeri
Deschampsia cespitosa
Koeleria macrantha
Sporobolus heterolepis
Artemisia ludoviciana
Symphyo. oblongifolium
Collomia grandiflora
Eriophyllum lanatum
Allium cernuum
Coreopsis lanceolata
Echinacea purpurea
Rudbeckia hirta
Monarda fistulosa
Liatris aspera
Oligoneuron rigidum
Symphyotrichum oolentagniense
The spring weather was very cool. Many plants, in particular the grasses, were slow to grow and were too small to plant out in the field. Some seeds did not germinate. However, my site was prepared and ready for planting, so I ended up buying plugs and plants from local nurseries so I could go ahead with the planting in April 2025. Although many plants are now ready (July), I will likely delay the planting till fall when the rains arrive. That means I will have to tend to these plants with regular watering over the summer. The extra plants will increase the planting density of the meadow and provide more balance between grass and flowers. Lesson learned: give yourself a full year to grow plants.
October 28, 2025 Update: The meadow has really filled in over summer. I am impressed at how well the plants grew. We had a very dry summer. Despite no irrigation, the plants survived and thrived. The prairie sage for example easily tripled in size. While I was planning on adding additional plants in fall, in reality there was very little room left to add the extra grasses. I did manage to squeeze in some bulbs (fritillaria, daffodils and crocuses). A pleasant surprise is the number of birds regularly foraging in the meadow. They feast on the seed heads of the asters, echinacea, achillae etc. Even the hummingbirds are still feeding on the blooms of the nepeta and salvia.
Conclusion
Although it's still early days, transforming our septic field into a meadow has been an enjoyable project. I will update this blog on a regular basis as the meadow matures and you can follow my garden on instagram @leslieann.gardens. I expect that the planting design will evolve—like all gardens. Some plants will thrive, others will struggle and disappear. Hopefully, this blog has inspired you to try something similar on your land. By carefully assessing your site, selecting the right plants, preparing the site, applying a suitable design, and following proper planting, watering, and maintenance techniques, you can also create a thriving prairie that will delight the senses and become a haven for wildlife.
Useful Reference Books
Diblik, R. (2014). The Know Maintenance Perennial Garden. Timber Press.
Diboll, N. Cox, H. (2023).The Gardener's Guide to Prairie Plants. Univ. of Chicago. 644p. ISBN 9780226805931
King, M. Perennial Meadows (Ebook series) accessed July 3 2025 https://www.perennialmeadows.com/prairie-perennial-meadows-ebook/
Norris, K. D. (2021). New naturalism: designing and planting a resilient, ecologically vibrant home garden. Cool Springs Press.
Norris, K. D. (2025). Your natural garden: a practical guide to caring for an ecologically vibrant home garden. Cool Springs Press.
Oudolf, P., & Kingsbury, N. (2013). Planting: a new perspective. Timber Press
Vogt, B. (2023). Prairie up: an introduction to natural garden design. University of Illinois Press.
Wormser, O., & Thompson, K. (2020). Lawns into meadows: growing a regenerative landscape. Stone Pier Press.
Helpful Blogs
"How to Plant a Meadow" Northwest Meadowscapes
"How to Prep Your Site for a Native Seed Mix" Prairie Moon Nursery
"The Deep Middle" excellent Blogs by Benjamin Vogt that cover many of the topics discussed above in greater detail. See also his book.
Interesting Websites
Plant and Seed Resources
Akene seeds: native plants seed supplier from Quebec. https://akene.ca/en
Novus Plants Wholesale Nursery: a wholesale only nursery serving Vancouver Island @novusplantswholesale
Northwest Meadowscapes: a native seed farm located on Whidbey Island, USA specializing in the cultivation and sale of native grass and wildflower seeds for the Pacific Northwest region. Seeds and meadowscaping consultation. https://northwestmeadowscapes.com
Prairie Moon Nursery: a nursery in Midwest, USA with a very large catalogue of native seeds. Will ship to Canada. https://www.prairiemoon.com/meet-prairie-moon.html
Phoenix Perennial: a retail and mail order nursery in Richmond, BC with a large mail order catalogue featuring many West Coast native plants. https://www.phoenixperennials.com
Satinflower Nurseries: an ecological native plant nursery on Vancouver Island. Seeds, plugs and meadowscaping consulation. https://satinflower.ca
Stellata Plants: a small nursery on Vancouver Island that offers a selection of rare to find drought-tolerant plants. Pick up only. https://stellataplants.com
West Coast Seeds: located in BC, offers a selection of native flower seeds. Westcoastseeds.com


Comments